In today’s world of smartphone photography and videography, capturing stunning images and videos has never been more accessible. However, achieving that professional look often requires a steady hand and the right equipment. A phone tripod can be a game-changer, providing stability and versatility for your creative projects. This step-by-step guide is designed to empower you, whether you’re a beginner or an experienced user, with the knowledge and confidence to set up your phone tripod effortlessly. Let’s embark on this journey to elevate your skills and transform the way you capture your moments!


Gather Your Equipment
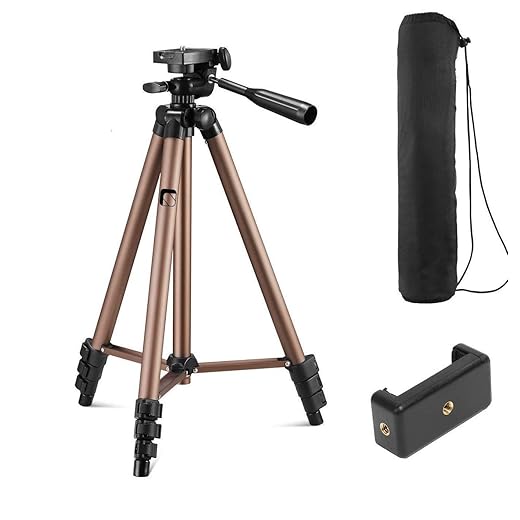
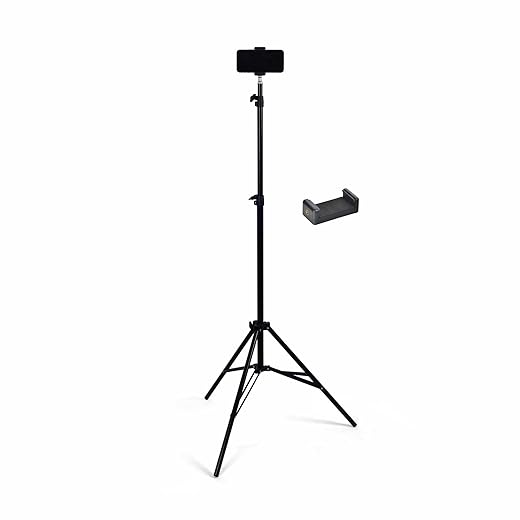
Gather your phone tripod and ensure it is fully adjustable to fit your shooting needs. Check that your smartphone is charged and has enough storage space for your intended media. If necessary, attach a phone mount to your tripod for added stability and ease of use. Keep any additional accessories, such as lens attachments or external microphones, nearby to enhance your filming experience.
Set Up the Tripod Legs
Unpack the tripod carefully, ensuring all components are intact. Extend each leg by loosening the locking mechanisms and pulling them out to your preferred height. Spread the legs evenly, adjusting as necessary to maintain a stable base. Check that all locks are securely fastened before placing any equipment on the tripod.
Lock the Tripod Legs
Extend the tripod legs to your desired height. Align the locking mechanisms found on each leg, ensuring they are properly seated. Firmly push or twist the locks, depending on the tripod model, until you hear or feel a click, indicating they are secured. Check each leg individually for stability and make adjustments if necessary to ensure a sturdy setup.
Attach the Phone Mount
Attach the phone mount securely to the tripod head by aligning the mounting plate with the threaded screw. Rotate the mount clockwise until it feels snug, ensuring it is tightly secured to prevent any wobbling. Check the connection by giving the mount a gentle tug; it should remain firmly in place. Ensure that the orientation of the mount is correct for your phone’s landscape or portrait mode before proceeding.
Position Your Smartphone
Place your smartphone into the mount, ensuring it fits snugly and aligns with the mount’s grip. Check that the device is secure by gently shaking the mount; it should hold the smartphone firmly without wobbling. Adjust the position to frame your shot by tilting or rotating the smartphone as needed. Ensure the lens is unobstructed and positioned at the desired angle for optimal composition.
Adjust the Tripod Height
Adjust the tripod legs evenly to achieve the desired height. Check the stability by gently shaking the tripod; it should not wobble or shift. If adjustments are needed, lock the leg clips securely to prevent slipping. Position the camera at the desired angle, ensuring that the tripod remains steady throughout your shoot.
Check for Stability
Gently shake the tripod from side to side and observe if it remains steady. If it wobbles or shifts, tighten any loose knobs or leg locks to secure the legs in place. Adjust the legs to ensure they are evenly extended; if one leg is shorter, extend it until the tripod stands level. For added stability, place the tripod on a flat surface and, if necessary, use spikes or weights to anchor it down further, especially in windy conditions.
Frame Your Shot
Open your smartphone’s camera app and focus on the subject you want to capture. Adjust the zoom level if necessary to ensure your subject fills the frame without cutting off important details. If your shot doesn’t look right, reposition your tripod by raising or lowering it to achieve the desired angle. Experiment with different heights and distances; for instance, a low-angle shot can create a dramatic effect, while a close-up can highlight intricate details.
Take Your Photos or Videos
- Position your camera or smartphone on a stable surface or tripod.
- Ensure your framing is perfect and the lighting is optimal.
- Activate the timer function on your camera or use a remote shutter for convenience.
- Press the shutter button or activate the timer to capture your photos or videos.
- Take multiple shots to increase the chances of getting the perfect image or clip.
- Review your captures to select the best ones for editing or sharing.
Final Tips and Best Practices
In conclusion, setting up a phone tripod is an easy yet effective way to elevate your photography and videography skills. By following the simple steps outlined in this guide, you can achieve stable and professional-looking shots that capture your moments beautifully. With the right setup, you’ll be ready to unleash your creativity and take your content to the next level. Happy shooting!
Essential Equipment List
- Tripod
- Phone mount
- Smartphone
- Leveling tool (optional)
- Remote shutter (optional)
- Extra weights (optional)

Maximize Stability
- Choose the Right Tripod: Select a tripod that is compatible with your smartphone’s size and weight. Look for a tripod with adjustable height and flexibility
- Use a Smartphone Mount: Invest in a quality smartphone mount that securely holds your phone. Ensure it has a grip that won’t scratch your device
- Check Stability: Before use, ensure the tripod is on a stable surface. Adjust the legs to ensure even footing and avoid wobbling
- Adjust the Height: Set the tripod to a height that suits your shooting angle. Remember to lock the adjustments to maintain stability
- Secure the Phone: Make sure your phone is securely fastened in the mount and double-check the grip before starting to shoot
- Level the Tripod: Use a bubble level (if available) to ensure your phone is level, especially for video recording to prevent tilted shots
- Use a Remote Shutter: To avoid shaking the tripod when taking photos, consider using a remote shutter or the timer function on your phone
- Experiment with Angles: Don’t be afraid to try different angles and orientations (landscape vs. portrait) to find the best composition
- Plan for Lighting: Position the tripod where natural light is optimal, or use additional lighting sources to enhance your shots
- Practice Adjustments: Familiarize yourself with adjusting the tripod quickly so you can adapt to changing conditions while shooting
Maximize Your Mobile Photography with These Essential Tips
- Choose the Right Tripod: Look for a lightweight and portable phone tripod that fits your phone’s size. Some tripods come with adjustable arms or clips, ensuring a secure fit
- Set Up the Tripod: Extend the legs of the tripod to a stable height, ensuring it’s on a flat surface. If it has adjustable angles, position the phone holder to capture the desired perspective
- Stabilize Your Phone: Secure your phone in the holder and check that it is firmly in place. Adjust the angle for the best framing of your shot, whether you’re taking photos or recording videos
- Use a Timer or Remote: If you’re taking selfies or group shots, use the timer feature on your phone’s camera or a remote shutter to avoid camera shake
- Experiment with Angles and Settings: Try different angles and settings to find the best composition. Don’t hesitate to adjust the height and tilt of the tripod for creative shots
Essential Questions About Phone Tripods
Yes, specific weight limits for phone tripods do exist, and they play a crucial role in ensuring stability. Each tripod is designed to support a certain maximum weight, which typically includes the weight of the smartphone and any additional accessories, such as a microphone or light.
When a phone exceeds the tripod’s weight limit, it can lead to instability, resulting in shaky footage or the risk of the phone toppling over. Stability is impacted because the tripod is engineered with a certain balance and structural integrity based on the weight it can safely support. If the weight distribution is off, or if the materials are insufficient for a heavier load, the tripod may not maintain its position, particularly in windy conditions or when extended at full height.
Therefore, it’s essential to choose a tripod that not only supports the weight of your phone but also accounts for any additional equipment to ensure optimal stability during use.
There are several types of phone tripods available on the market, each designed for different uses and scenarios. Here are some common types:
- Tabletop Tripods: These are compact tripods designed for use on tables or other flat surfaces. They are typically shorter in height and are great for stationary shots, vlogging, or when working in tight spaces.
- Flexible Tripods: These tripods feature adjustable, bendable legs that can wrap around various objects or uneven surfaces. They are versatile and can be used for creative angles and stability on irregular terrains.
- Full-Size Tripods: These are standard height tripods that can extend to many feet tall, suitable for outdoor photography or videography. They are often more stable and can handle heavier setups.
- Mini Tripods: Smaller than full-size tripods, these are portable and often used for mobile photography. They can be easily carried in a bag and are ideal for quick setups.
- Selfie Stick Tripods: These combine the features of a selfie stick and a tripod, allowing users to take selfies or group photos with stability. They are usually adjustable and can extend to various lengths.
- Gimbal Tripods: These are specialized tripods that come with a gimbal mechanism to stabilize video footage. They are ideal for dynamic filming and capturing smooth motion.
- Action Tripods: Designed for use with action cameras or smartphones during movement, these tripods are often rugged and can withstand various environments.
Each type of tripod has unique features that cater to specific needs, making them suitable for different types of photography or videography.

